In this blog post I want to run through the process of wiring up the iPhone’s camera to CoreML using Vision Kit. This will let us run CoreML models against the camera input.
The full sample code can be found here: https://github.com/atomic14/VisionCoreMLSample
To follow along with this you will need a device that is running iOS11 - whilst this is still in beta I’d suggest using a test device or a spare device that is not critical to your everyday life…
You’ll also need the beta version of xCode - you can download this from https://developer.apple.com
Capturing Video Frames from the camera
Before we can do any Vision magic we need to get image frames from the camera.
Create a new project in xCode-beta using the “Single View App”
Navigate to the ViewController.swift file and we’ll set up AVFoundation so we can start capturing video frames.
We need to import AVFoundation and Vision frameworks:
import AVFoundation
import Vision
Add the following member variables to your view controller:
  // video capture session
  let session = AVCaptureSession()
  // queue for processing video frames
  let captureQueue = DispatchQueue(label: "captureQueue")
  // preview layer
  var previewLayer: AVCaptureVideoPreviewLayer!
  // preview view - we'll add the previewLayer to this later
  @IBOutlet weak var previewView: UIView!
This creates our AVCaptureSession and also sets up a dispatch queue for processing frames that are being captured.
The remaining variables will be set up in our viewDidLoad method.
override func viewDidLoad() {
  super.viewDidLoad()
  // get hold of the default video camera
  guard let camera = AVCaptureDevice.default(for: .video) else {
    fatalError("No video camera available")
  }
We need to check that we have a camera available for video capture - you might want to do something slightly more user friendly instead of fatalError in a real application.
session.sessionPreset = .high
This sets the session to output at the highest resolution - you may want to experiment with different resolutions especially if your model only processes low resolution images.
// add the preview layer
previewLayer = AVCaptureVideoPreviewLayer(session: session)
previewView.layer.addSublayer(previewLayer)
This creates a video preview layer for our session and adds it to our preview view (we’ll need to create preview view in our storyboard and wire it up to the outlet).
// create the capture input and the video output
let cameraInput = try AVCaptureDeviceInput(device: camera)
This creates the input stream for the session from our camera.
let videoOutput = AVCaptureVideoDataOutput()
videoOutput.setSampleBufferDelegate(self, queue: captureQueue)
videoOutput.alwaysDiscardsLateVideoFrames = true
videoOutput.videoSettings = [kCVPixelBufferPixelFormatTypeKey as String: kCVPixelFormatType_32BGRA]
And this creates the video output for our session. We set ourselves as the delegate for handling frames, tell the video output to discard frames that we aren’t fast enough to handle and then set the format of the output that we want to process.
We can now wire up our session and start it running:
// wire up the session
session.addInput(cameraInput)
session.addOutput(videoOutput)

// make sure we are in portrait mode
let conn = videoOutput.connection(with: .video)
conn?.videoOrientation = .portrait

// Start the session
session.startRunning()
This adds the input and output to the session, fixes the video output to portrait mode and kicks off the session.
To make sure our previewLayer has the correct size and shape for our view override viewDidLayoutSubviews:
override func viewDidLayoutSubviews() {
  super.viewDidLayoutSubviews()
  previewLayer.frame = self.previewView.bounds;
}
and finally change our ViewController so that it implements AVCaptureVideoDataOutputSampleBufferDelegate:
class ViewController: UIViewController, AVCaptureVideoDataOutputSampleBufferDelegate {

  func captureOutput(_ output: AVCaptureOutput, didOutput sampleBuffer: CMSampleBuffer, from connection: AVCaptureConnection) {
  }
Finally we need to update our info.plist to include an entry for “Privacy - Camera Usage Description”. Go to your info.plist and add the key “Privacy - Camera Usage Description” with a value that describes why your app needs to use the camera.
Make sure you have gone into your storyboard and wired up the preview view and then run the application on your test device.
If everything is working then you should see a popup asking for permission to use the camera and when you click ok you should see the camera preview.
Wiring up Vision and CoreML
Now that we are getting frames from the camera we can start feeding them into the Vision framework and processing them with CoreML.
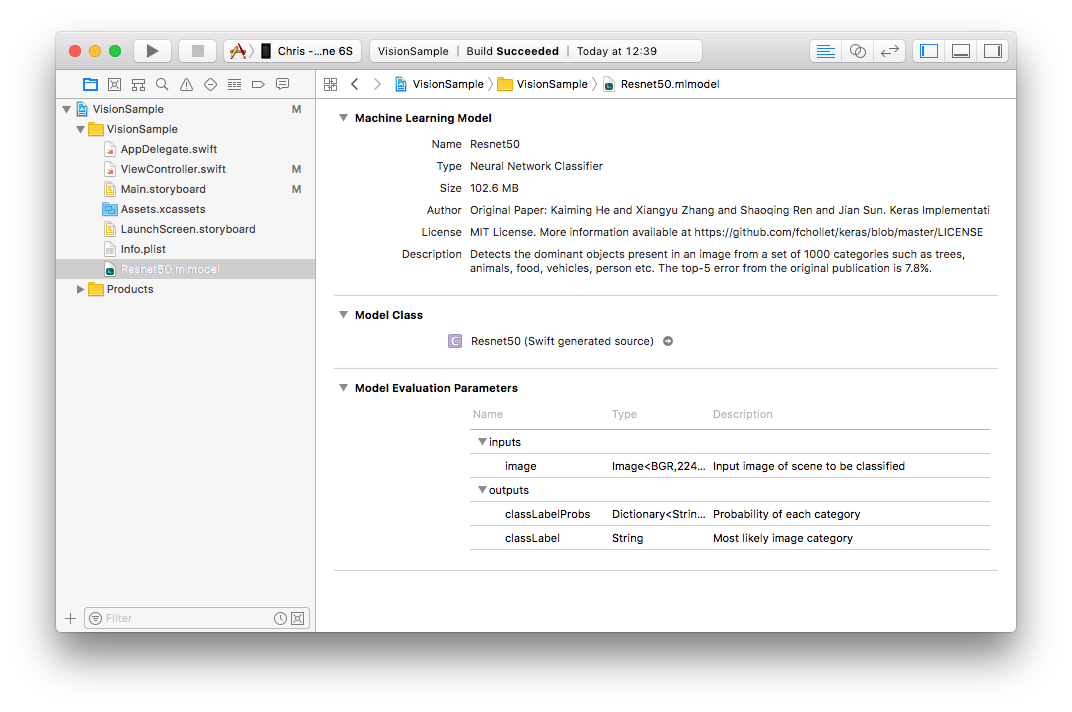
Download the ResNet50 sample model from Apple from here: https://developer.apple.com/machine-learning/ and once downloaded drag the model into our project.
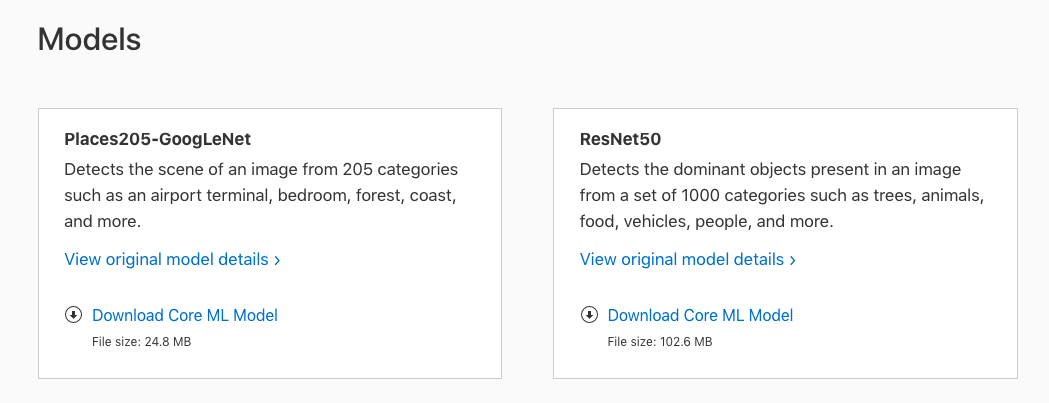
Once downloaded drag the model into your xCode project - make sure you check the “Copy if necessary” checkbox.
We can now use the Vision framework to pass images to this model for processing.
Add a new member variable to hold the vision requests we want to make (you can make multiple vision requests, for this example we’re just going to make one):
// vision request
var visionRequests = [VNRequest]()
And in our viewDidLoad we’ll load up the model and create our request:
// set up the vision model
guard let visionModel = try? VNCoreMLModel(for: Resnet50().model) else {
  fatalError("Could not load model")
}
// set up the request using our vision model
let classificationRequest = VNCoreMLRequest(model: visionModel, completionHandler: handleClassifications)
classificationRequest.imageCropAndScaleOption = VNImageCropAndScaleOptionCenterCrop
visionRequests = [classificationRequest]
This code loads our model and creates a vision request. We set the VNImageCropAndScaleOptionCenterCrop as our model requires a square image of 244x244 pixels.
For our completion handler we want to process the results from the model and display them on the screen:
func handleClassifications(request: VNRequest, error: Error?) {
    if let theError = error {
      print("Error: \(theError.localizedDescription)")
      return
    }
    guard let observations = request.results else {
      print("No results")
      return
    }
    let classifications = observations[0...4] // top 4 results
      .flatmap({ $0 as? VNClassificationObservation })
      .map({ "\($0.identifier) \(($0.confidence * 100.0).rounded())" })
      .joined(separator: "\n")

    DispatchQueue.main.async {
      self.resultView.text = classifications
    }
}
Here we check for any errors and no results. The we take the top 4 results map them to VNClassificationObservation objects and then turn it into a string with the label of the object detected and the confidence of the classification.
You’ll need to add a UILabel to your storyboard to display the results and wire it up to an IBOutlet.
Our final step is to update captureOutput so that it processes the camera image with our vision requests.
First we need to get the pixels from the sampleBuffer:
func captureOutput(_ output: AVCaptureOutput, didOutput sampleBuffer: CMSampleBuffer, from connection: AVCaptureConnection) {
  guard let pixelBuffer = CMSampleBufferGetImageBuffer(sampleBuffer) else {
    return
  }
Some of the vision processing needs to know about the camera so we pull that from sampleBuffer:
var requestOptions:[VNImageOption: Any] = [:]

if let cameraIntrinsicData = CMGetAttachment(sampleBuffer, kCMSampleBufferAttachmentKey_CameraIntrinsicMatrix, nil) {
  requestOptions = [.cameraIntrinsics: cameraIntrinsicData]
}
And finally we can kick off our vision requests using VNImageRequestHandler:
  // for orientation see kCGImagePropertyOrientation
  let imageRequestHandler = VNImageRequestHandler(cvPixelBuffer: pixelBuffer, orientation: 1, options: requestOptions)
  do {
    try imageRequestHandler.perform(self.visionRequests)
  } catch {
    print(error)
  }
}
You can now build and run and you should see the image classifier displaying what it thinks the camera can see.
The full sample code for this post can be found here: https://github.com/atomic14/VisionCoreMLSample