HELP SUPPORT MY WORK: If you're feeling flush then please stop by Patreon Or you can make a one off donation via ko-fi
I got some of these addressable LED curtains a while back with the intention of taking them apart and seeing how hackable they are. Turns out the answer is very hackable!
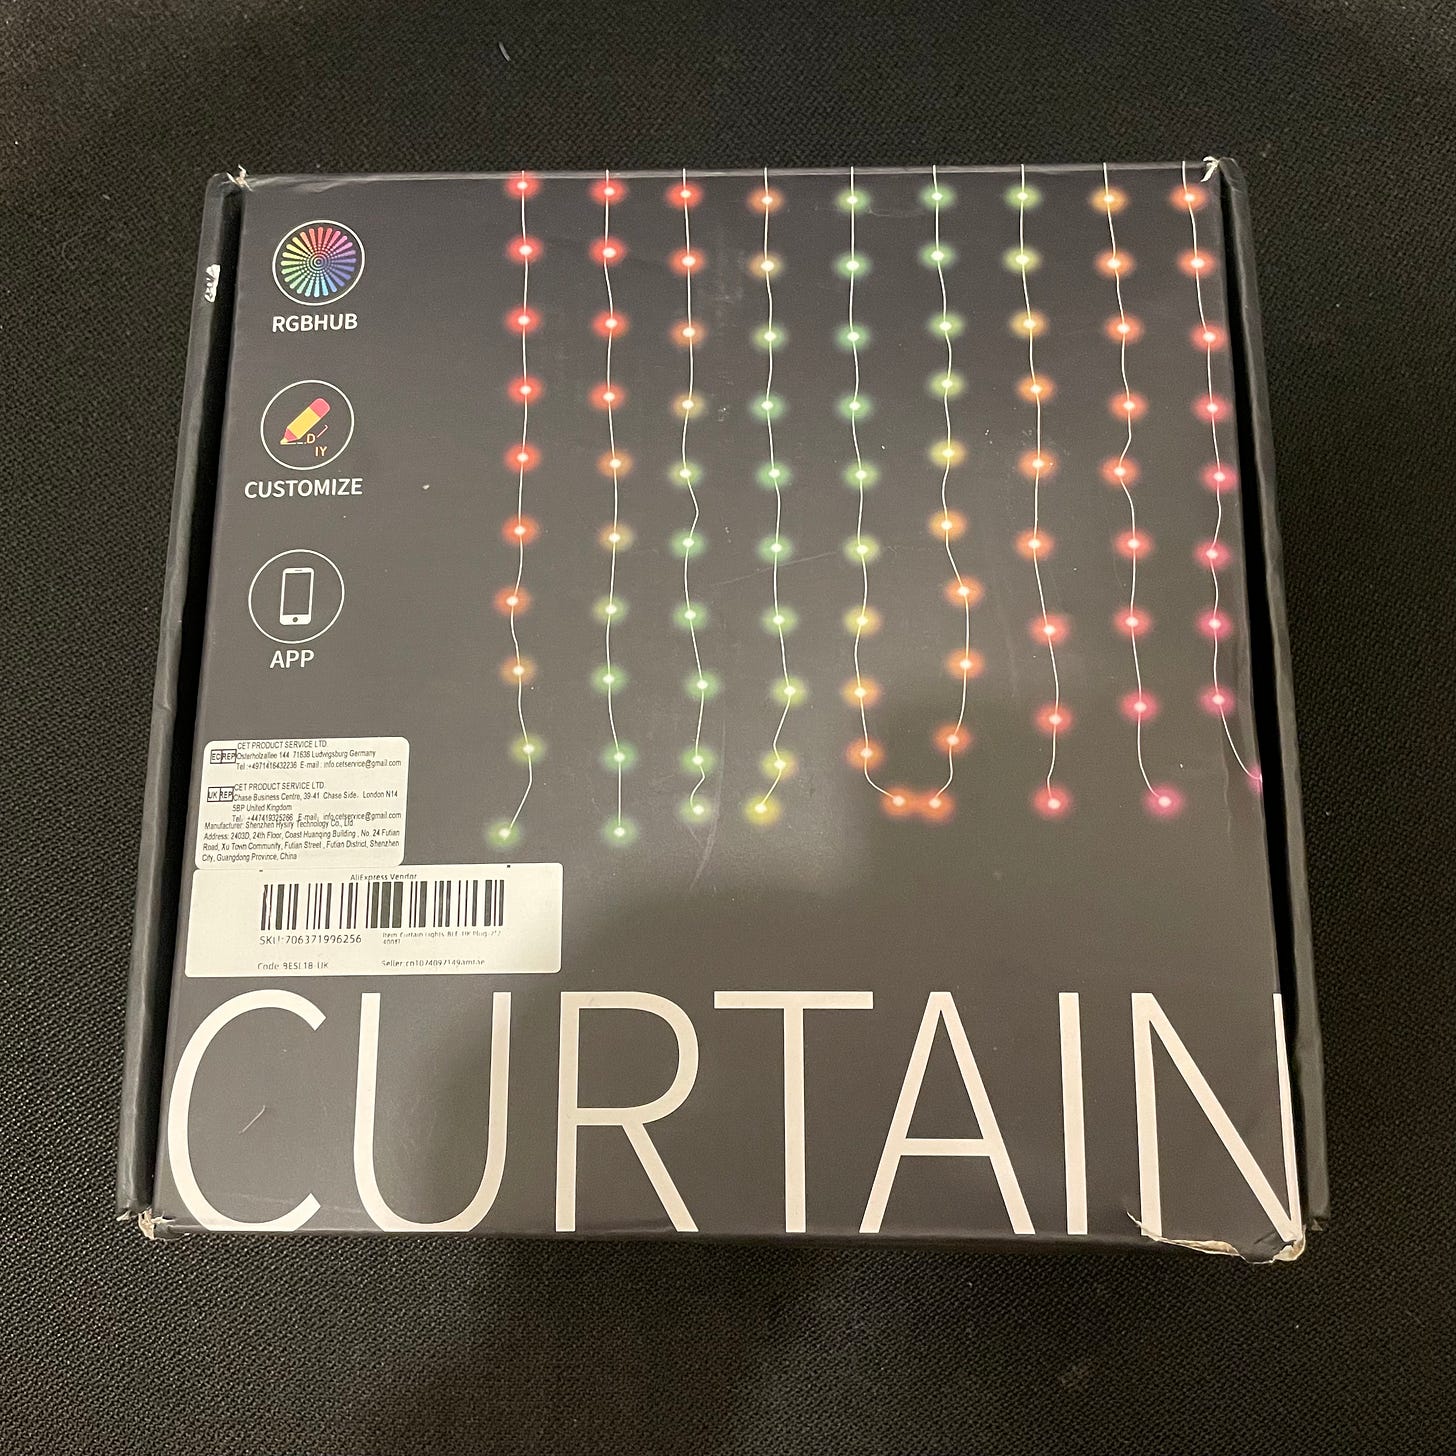
The one I got is 2m x 2m with 400 LEDs - that’s a lot of LEDs!
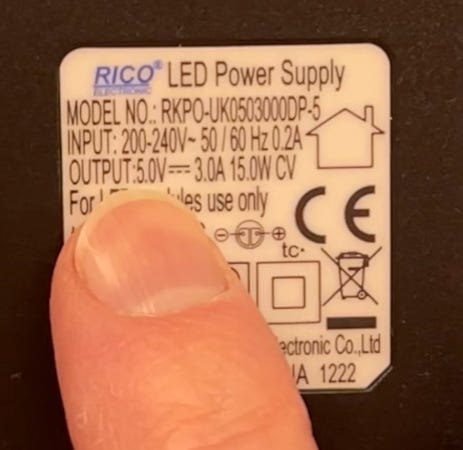
Looking at the power supply my initial thought was that these were just typical WS2818B addressable LEDs as the power supply was the standard 5V.
However, there’s something pretty interesting about these LEDs. I’m very used to the 3 pin addressable LEDs, you have the two power pins - 5V and GND - and you have the two data pins - Din and Dout.

You typically daisy chain the LEDs together, the Dout from each LED connects to the Din of the next LED.
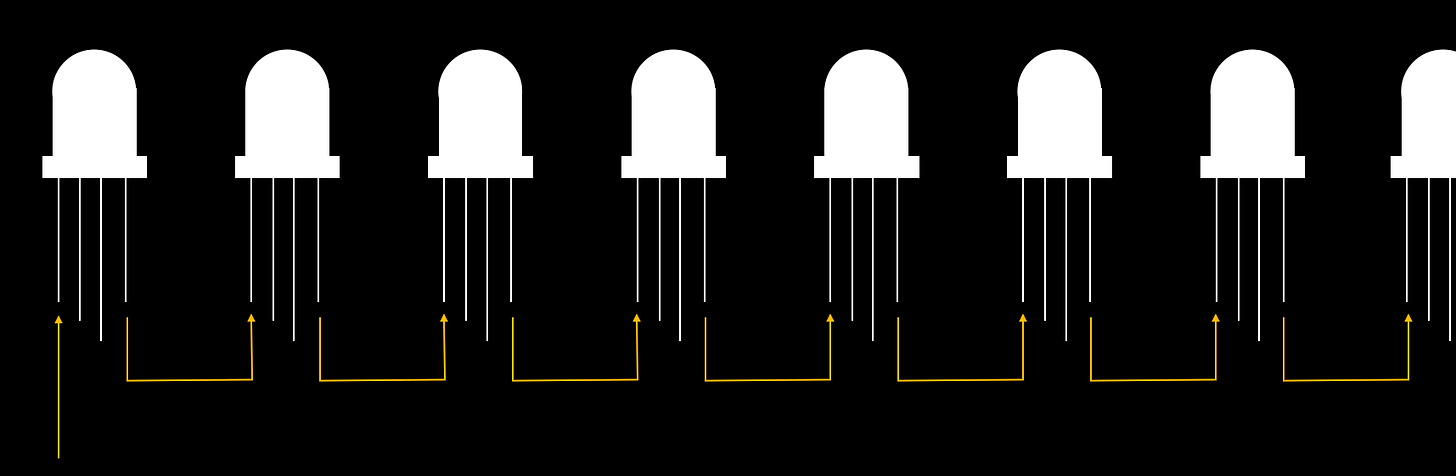
To get the LEDs to light up you just push all the serial data into one end of the chain of LEDs and then wait for a short delay. Each LED then latches whatever serial data it last saw on it’s Din pin. It’s a pretty simple clever 1 wire serial protocol.
What struck as slightly odd with this LED curtain is that I could only see three wires going down each strand of the curtain. And the bottoms of the strands did not connect to the next strand.
So I could not work out how the LEDs could be chained together. Looking closely all the data pins are connected as a bus, there’s no daisy chaining at all - how could this possibly work?
It turns out that these LEDs are pre-programmed with their position on the string - they receive all the data for all the LEDs, but they know which bit of data is relevant to them. It’s pretty bonkers - I’ve no idea how this is done in the factory where the curtains are constructed, but I assume they get a long string of pre-programmed LEDs with preset lengths and then chop them up for the curtains.
I did find a pretty interesting GitHub issue on the WLEDs project where some people have managed to get pretty nice photos of the LEDs
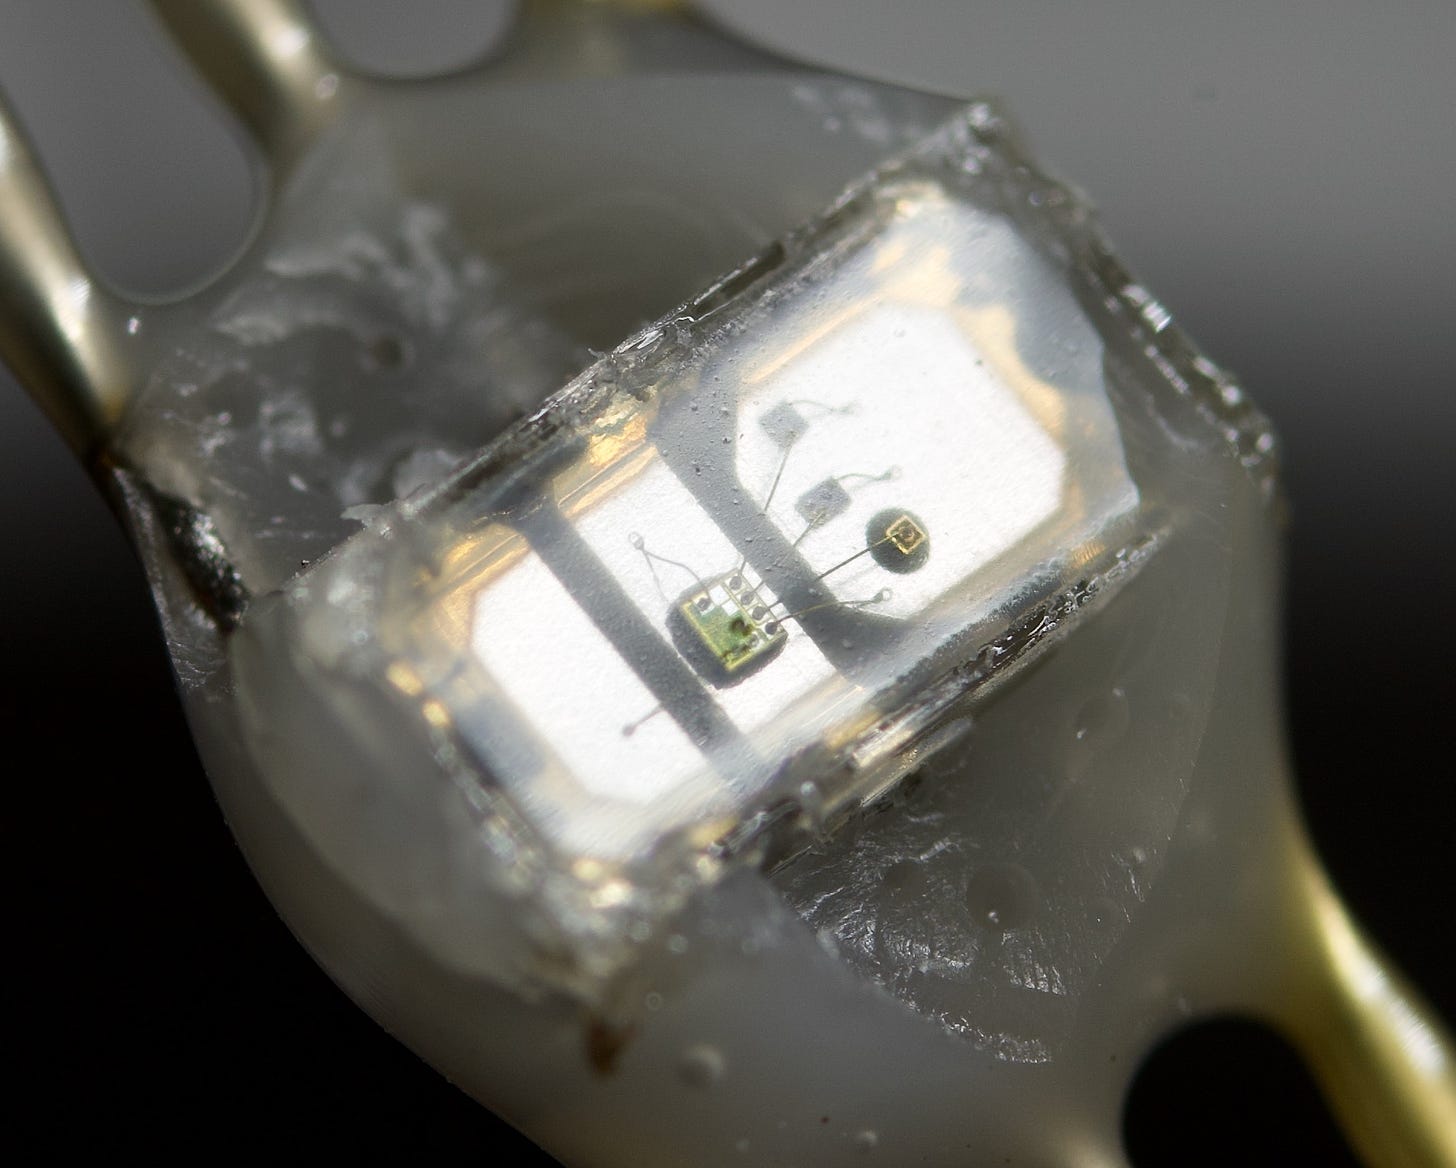
I managed to extract the control PCBs and it’s pretty simple.

The main brains is an ST17H66B this is a Bluetooth Low Energy system on chip. The antenna for it is the wiggly line on the PCB.
It drives the LEDs via this buffer IC (SN74LVC1G125) which level shifts the output from the MCU’s 3.3V up to 5V.
Interestingly, they’ve got an option for not populating this IC and bypassing it - maybe for smaller curtains it’s not needed.
Looking at the output on the oscilloscope we can see what looks like typical WS218B waveforms.
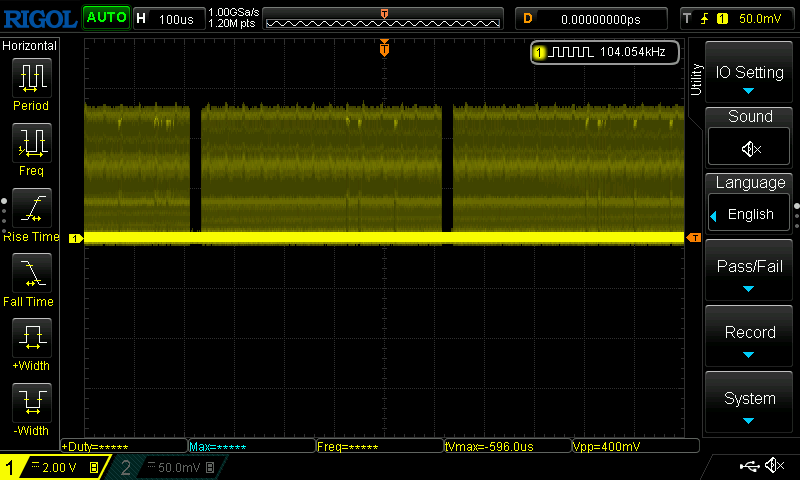
We have a burst of data - this is the RGB data for the LEDs - followed by a gap - followed by another burst of data. The gap is what tells the LEDs to latch and display the current data.
So, these LED curtains should be easily hackable and we should be able to drive them using the popular WLED firmware.
So I flashed one of my ESP32s and connected up the LED curtain - and it works!
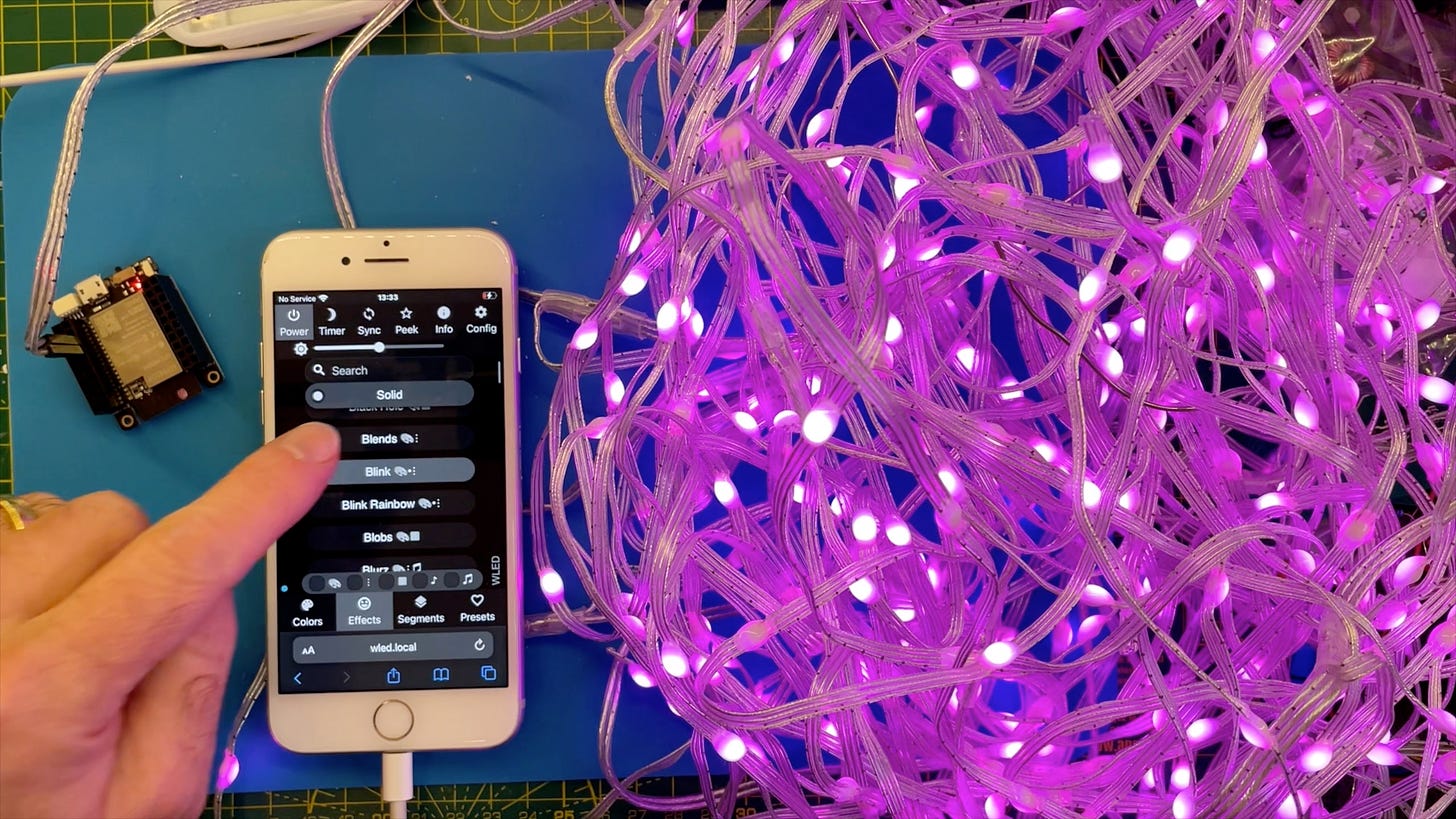
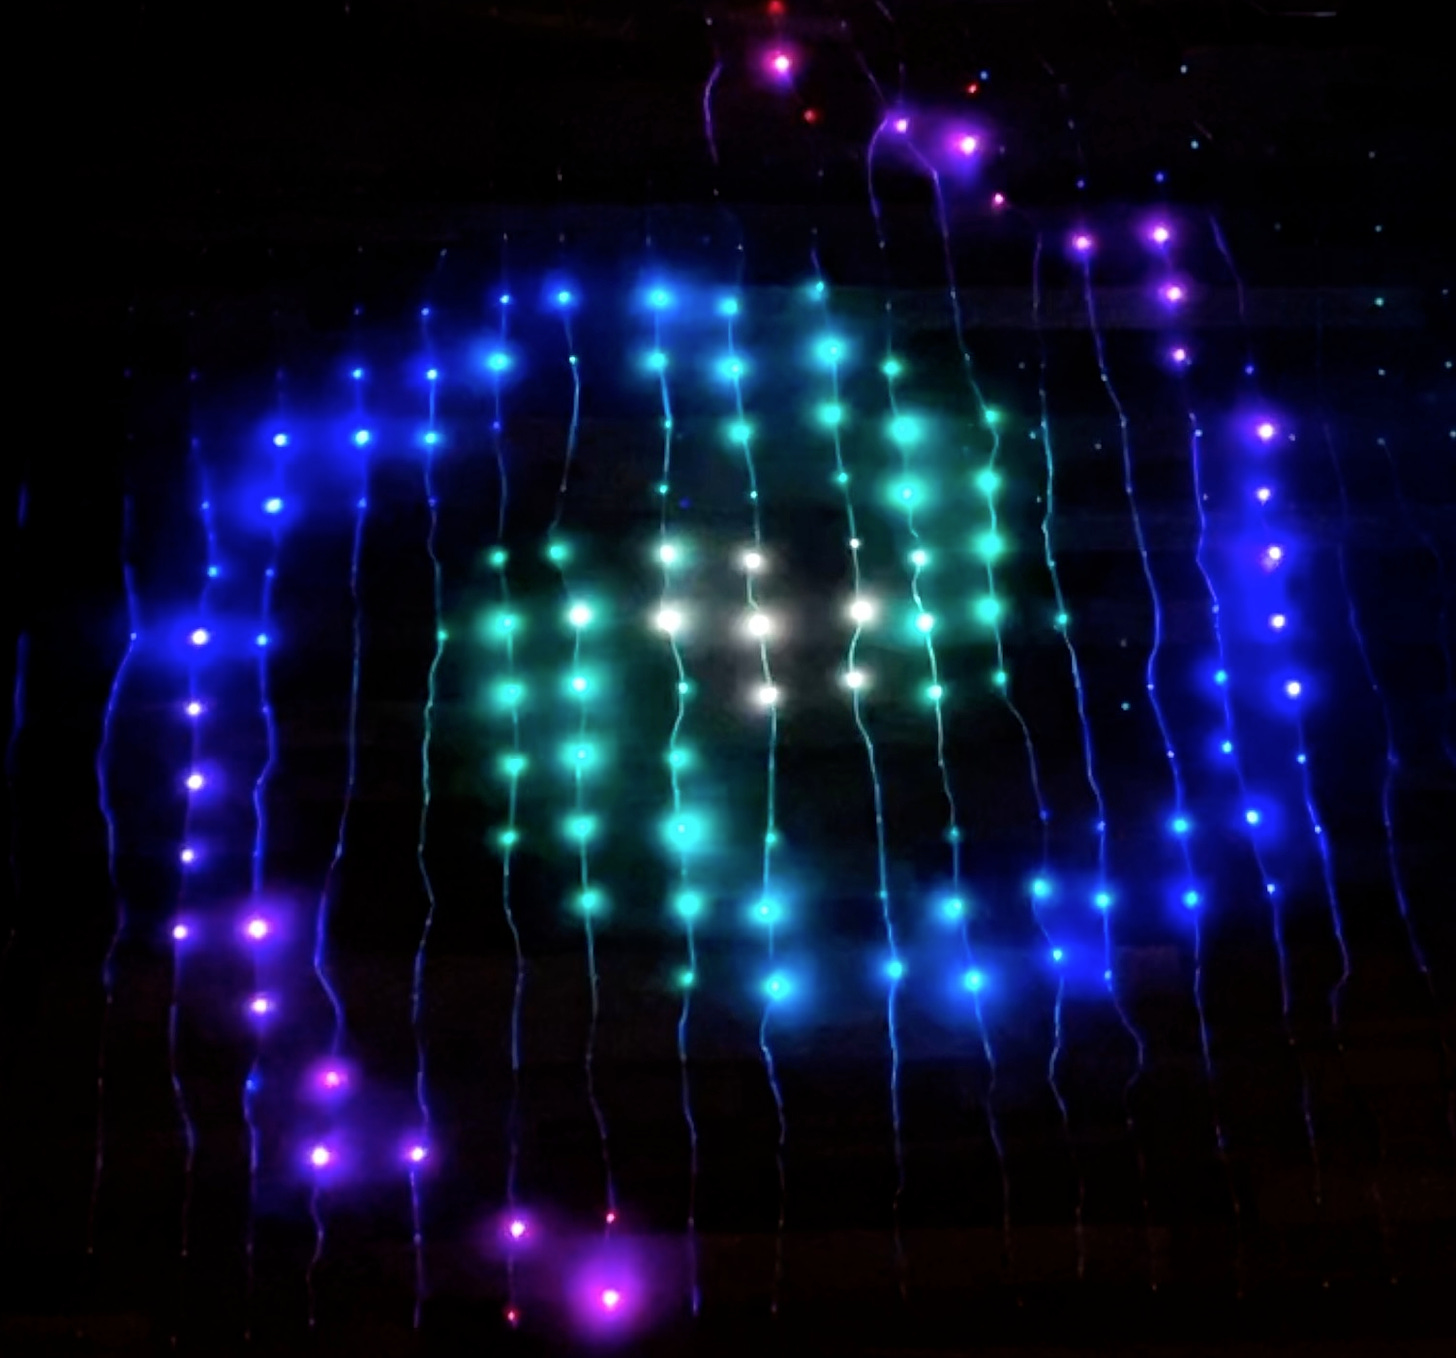
What’s more, we can use WLEDs in 2D grid mode and get all sorts of cool patterns to come out.
All in all a pretty successful hack. There’s a lot more detail in the video - go take a look now!
Related Posts
Self Organising WS2811 LEDs - I've successfully used addressable WS2811 LED strings and an ESP-CAM board to create an adjustable lighting system. The best part is that the image processing code can be duplicated in JavaScript which allows you to use a plain dev board to drive the LEDs instead of needing a camera on your ESP32 board. If you want to replicate this project, you'll need your own ESP32 dev board and some addressable LEDs. After figuring out the location of each LED in 2D space, it's easy to map from each LED's x and y location onto a pattern you want to show on the frame buffer. Desiring to keep it accessible, I've posted detailed instructions and my sample code on GitHub, making sure anyone with basic knowledge can undertake this fun technological DIY project!
Look at my shiny crystal balls - Just upgraded my basic AliExpress crystal balls with some tech wizardry - I've thrown in an ESP32-S3-MINI, a mic, and made them battery powered. Thanks to WLED software, they're now smart and responsive! Shared the KiCAD project for fellow tinkerers. Check out my video to see these balls in action!
The PCBs are in production - what have I messed up? - After some stress and trepidation, I finally took the plunge and sent my PCB design off for manufacturing. My design centers around building a large seven-segment clock with LED filaments. Jumping hurdles such as voltages, pin usage, and limiting the load on my power supply, I've settled on the ESP32 as the system's heart and come up with a final circuit design. While doing this, I've quickly realized I could improve my layout and fixed a small mistake. Also, I've prepared for either types of LED filaments - the high-voltage ones or the larger, 3v ones. However, I did bungle up a couple of things on the enable line of the shift registers and board layout. But hey, this is a learning curve, right? Can't wait to get the boards and see what other exciting errors surface!
Minimalist Microcontroller: Building a Bare-Bones Dev Board - In a thrilling DIY endeavour, I attempted to build the most minimalist ESP32 dev board possible. Diving deep into the schematic of the ESP32 S3 WROOM module, I chopped out the non-essentials and whittled our needs down to bare bones. The experiment saw me juggling USB data lines and voltage regulators, waving goodbye to an array of capacitors and connectors and boldly embracing the simplicity of direct connections. Despite a few hitches, the miniature Frankenboard came alive, proving that sometimes less is more...at least in the world of microcontrollers.
Hue Light Hack - In a fun-filled deep dive into a Philip's Hue Color light bulb, I disassembled, analyzed, and ultimately restored it to working order. Over the course of the hack, I dismantled the bulb’s interior, from the aluminum PCB to the tiny ICs on the logic board, gave a detailed breakdown of their functions and even reverse engineered the signals controlling the colors. Most of the colors worked out pretty well, except for the dodgy yellow. Also, I tried running the hacked bulb setup with my old Moonlamp project. It was a great challenge and an exciting journey!
Related Videos
Most Interesting Addressable LEDs that I've Ever Seen - So, I got this nifty 2x2 meter 400 LED curtain and immediately went to work dismantling it. The LED strands are tapped off the main wire, rather than daisy-chained, which is a departure from the norm. Turns out, these LEDs are pre-programmed, allowing them to intelligently latch onto the right serial data. Unraveling the control unit, we see an IR receiver and other key components responsible for driving the LED strings. Despite my misgivings about deciphering in-built Bluetooth characteristics, I hooked the circuit back up with our dependable WLED software and got some amazing grid patterns. Interestingly, the LEDs operated smoothly at 3.3V. All in all, a fun exploration of hacking this LED curtain.
Magic LEDs: Self-Organizing with ESP32 CAM & Simple Image Processing! - Unleash your creativity and transform chaos into order using an ESP32 camera board, image processing, and a string of WS2811 RGB LEDs. Find out how wiring, level shifting, and a simple web interface bring this mesmerizing project to life.
Make Your Christmas Tree Dance to the Beat! - Transform your Christmas tree into an interactive light show using a string of 200 WS2811 addressable LEDs, self-organizing LEDs project, and an ESP32 to drive them. Learn how to map images onto LED locations and create amazing visual effects.
Look at My Shiny Crystal Balls - Custom ESP32 PCB With WLED. - Step right up, folks, for the grand unveiling of my shiny new crystal balls – yes, crystal balls. I've transformed ordinary AliExpress pieces into juggernauts of light and color, all powered by the splendid WLED software. Dive deep with me into the nitty-gritty of the underlying electronics and come face-to-face with the true beauty of voltage measurements (I promise, it's more riveting than it sounds). While the original circuit boards from AliExpress might not thrill, my beefed-up version invites gasps of wonder, with microphone-controlled LEDs throwing light in a million dazzling ways. Join me as I chronicle my journey through schematic revisions, components selection, and technological trickery – in short, the wild ride that has led to this epic macOS light show.
DIY Wireless LEDs Made Easy: Step-by-Step Guide - Learn how to create your own wireless LEDs by reverse engineering the circuit and using simple components. Understand the cost comparison between Aliexpress and DIY version to see if it's worth building your own.
HELP SUPPORT MY WORK: If you're feeling flush then please stop by Patreon Or you can make a one off donation via ko-fi